
**HEADLAMP RELAY FIRE RISK**
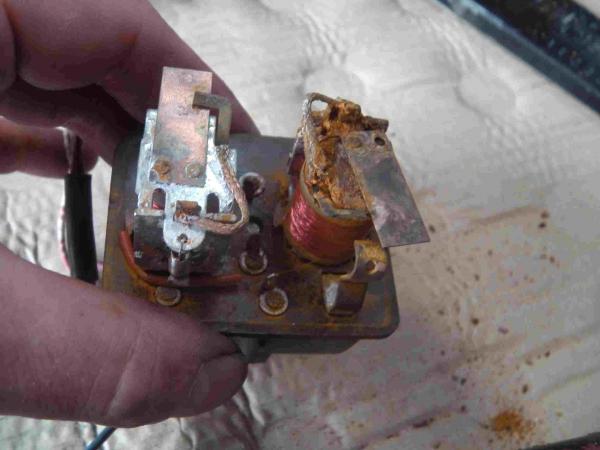
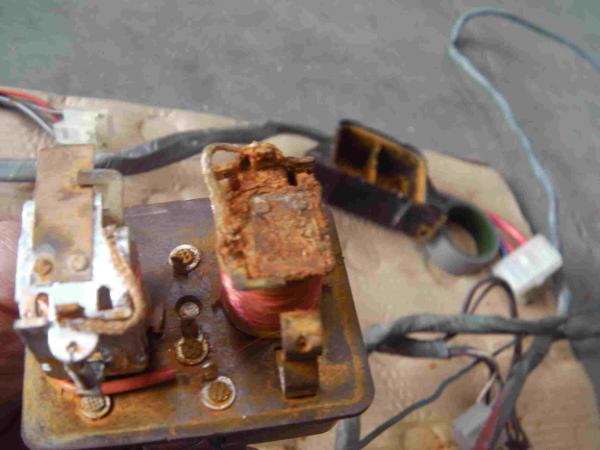
Do you have a headlamp relay? If so, it may be wise to install a fuse in the main RED wire feed. After examining several relays that are over 40 years old, I've discovered that many deteriorate—some due to rust, others from general wear. The issue arises when the metal 'Leaf' attached to the relay’s internals breaks off, potentially landing on the main live feed and creating a direct short to earth. Since Ford did not fuse the supply, this could lead to a direct BATTERY feed to earth, causing damage that could range from a melted wiring loom to, in the worst-case scenario, a fire.
I checked both relays salvaged from scrap cars, and both were rusted; one fell apart while I was filming—proof I captured live on camera! I'll be posting a video soon. The second relay was on the verge of failure.
DO NOT UNDERESTIMATE THE SIGNIFICANCE OF THIS POST. The relay poses a potential fire hazard as its MAIN FEED is UNFUSED! This presents a serious risk to your vehicle.
INSTALL AN INLINE FUSE TO THE LIVE FEED AT THE BOTTOM OF THE RELAY. Ensure to make a strong heat shrink and solder join. If you're unsure how to do this, consult an auto-electrician for assistance.
With many years of experience in auto-electrics, I strongly recommend that all Mk3 Cortina owners fuse the feed of this relay. Additionally, be cautious if you attempt to add extra lamps without correctly routing the appropriate cables and toggle relays. Overloading or neglecting this relay could lead to its failure and potentially endanger your car.
I hope this information proves helpful to all Mk3 owners.
Supplied by Pete Crompton, Club Member.
**BUYER'S GUIDE**
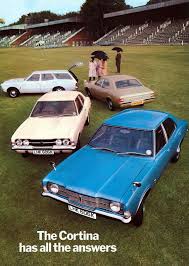
The Ford Cortina mk3 enjoyed a six-year production run, during which it became Britain's best-selling car.
A total of 1,126,559 units were sold, and today, it remains a favorite among enthusiasts.
If you're considering a purchase, there are several factors to keep in mind that can help ensure years of enjoyable classic motoring.
Since the last Cortina rolled off the production line in 1976, the youngest models are now over 40 years old.
These cars were known for their reliability and economical servicing costs, especially compared to other vehicles of their time.
**WHAT YOU NEED TO KNOW BEFORE BUYING**
Mechanically, these cars are straightforward and easy to repair, which is why they have been favored by mechanics. The 1300 engine is now quite rare, as it was only available in early models; most versions will feature either the 1600 or 2000 OHC Pinto engines. These engines are generally dependable, provided you change the engine oil every six months or after 6,000 miles—whichever comes first. Regular cambelt changes, as recommended, are also essential; this process is straightforward and significantly easier than in modern cars. In fact, with a bit of practice, changing the cambelt can be accomplished in under an hour.
Aside from that, there are no major inherent issues. The clutch and gearbox typically last a long time with proper care; however, do be aware of potential leaking rear axle wheel bearings, as their replacement can be costly due to the need for a press.
The suspension is generally reliable, though the rear void bushes tend to wear out relatively quickly. Fortunately, these are inexpensive and easy to replace.
One critical aspect to monitor is rust, a common issue in cars from this era. Pay particular attention to the outer sills, inner sills, doorsteps, boot floor, floor pan, front inner wings, and the box chassis along the entire length of the vehicle.
If these areas have not been addressed, you may either need to learn how to weld (MIG welding is manageable with practice) or be prepared for potentially high repair costs.
Find a Cortina where rust is already under control and the mechanics are in good condition, and you'll be rewarded with a practical, reliable car that promises years of motoring enjoyment.
MOT CHECKLIST
1. TYRES: Inspect tread depth and look for any damage, bulges, etc., ensuring they are properly inflated.
2. WIPERS: Ensure that the blades are in good condition and effectively clear the windscreen.
3. LIGHTS: Verify that all exterior lights are functioning correctly, including the main beam warning light, indicator warning light, and speedometer illumination. It's also wise to check that the ignition light is operational, as this can impact the charging system—nobody wants a flat battery on MOT day, or any day for that matter.
4. NUMBER PLATES: Must be clean and conform to legal size and font specifications, and be positioned correctly.
5. FUEL CAP: Must be securely fitted and in place.
6. WINDSCREEN WASHERS: If a windscreen is present, ensure that the washers on both sides are operational, providing a clear view of the road ahead.
7. Inspect for play in ball joints and track rod ends.
8. Confirm that the rubber components are not damaged.
9. Assess for play in the steering rack and check the gaiters and steering linkage.
10. Examine brakes.
11. Inspect bushes on the rear axle and other components.
12. Ensure seat belts function correctly and are in good condition.
Provided by members of the Mark III Cortina Owners Club.